thx, die funktionsweise der herstellung mag in max ähnlich sein, allerdings bringt einem das als relativem anfänger nicht viel. es wurde auch nicht der originalschliff verwendet
")
nach langem suchen hab ich ein tutorial gefunden allerdings ist dies nur relativ oberflächlich erklärt. ich poste das tutorial mal hier und erkläre wie weit ich bekommen bin bzw was ich nicht ganz kapiere.
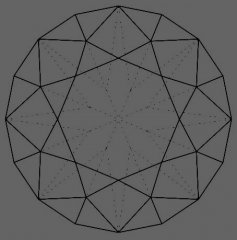
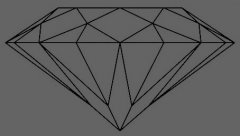
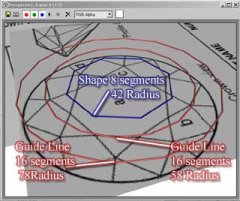
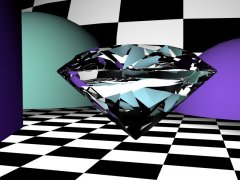
Diamonds are made in let say 'real time modeling'. It sound very complex but in this case it is quite easy. First we have to find a blue print or reference image of a diamond. (Here is copy that I made). There are several shapes of gems, I took the classic diamond shape, also called the 'round' shape. So the second step is to setup reference images and start to draw shapes in top view. I started with a top 8-gon because then I will have a perfect center for later use, then I clone it and fit it to the outlines in our reference image and instead to be 8-gon, I turned it to a 16-gon. Now we will clone our 16-gon and adjust the size so that it fits the intersection of our reference image. (we will use those two 16-gons as guideline only to have perfect geometry) Pic.4
(erster bildanhang)
hab ich soweit hinbekommen
")
jetzt kommen wir zum 2tenpart
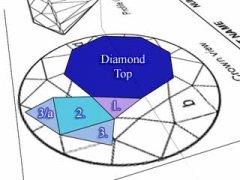
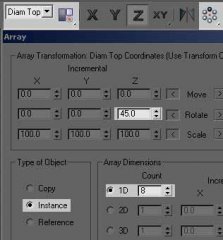
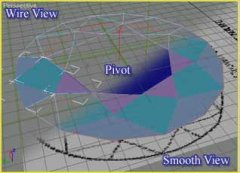
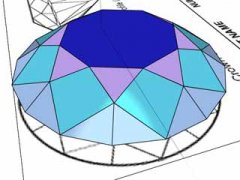
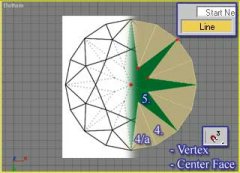
Now we activate 3D Snap (vertex snap is important, see Pic.5) and start to draw lines for our shapes. Of course we need to close spline when we are asked. Take a look at the Image (Pic.6) to see what shapes we have to build. Once the shapes are done you can turn them into meshes (Right click/Convert To Editable Mesh). We need to select meshes 1., 2., 3.,3.a and start to use the Diamond Top (mesh) as 'Transform Coordinate' (you should have the pivot in center of diamond top) (Pic.7). Now we will array it as instance object 8 times in 45 degree. So far top part of diamond in top view is finished.
(bild 2 und 3)
soweit is alles klar und denk ich nicht zu schwer.
jetzt kommen wir zum schwierigen part wo ich nichtmehr weiter weiss.
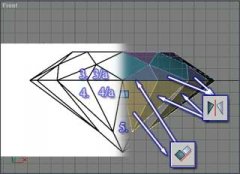
The next step is to add a third dimension (height) and we will do it from 'Left' or 'Front' View or to say on absolute Z axis. First we have to adjust the reference image so that widths are fit with our object and then we chose only one shape and adjust the vertices according to reference image. When the top is finished (Pic.9) you should select shape 3 & 3/a and then mirror it to the bottom. New meshes must be aligned to bottom side of top faces and then again array them as we did before. The next step is to adjust bottom vertices ( Pic.10). Now we will use our guideline 16-gon again. We will rotate it 22.5 degrees (or any other degree that coordinate system is orthogonal/parallel with our new shape) and use it as our 'Transform Coordinate' for the vertices' movement. There is only one more shape to be done, so let's do it. We should assign in 3D Snap ( 'Center Face' snap should be activated) because we will start to draw line from center of 'Top Shape' and later adjust all shape vertices according to vertices of our 4th shape ( Pic.11). When this is done we should also convert it to mesh and rotate array it 8 times. Now you should have your diamond done. Next step is to make every mesh unique to attach all meshes together and to weld all vertices.
You should have a total of 41 vertices in the mesh.
(bild 4,5,6,7 und das referenzbild)
hier kapier ich nichtmehr viel, da es nicht ausführlich geschrieben ist.
könnte sich jemand der sich auskennt die mühe machen das ganze zu übersetzen?
und die oberflächlichen schritte nachvollziehbar machen
wie bekomme ich allein das referenzbild so in den perspektiven viewport wie er es hier in bild 4 hat?
villeicht stell ich mich auch nur zu blöd an.
das originaltutorial gibts hier als zip is villeicht besser als meine erklärung.
http://www.trackblasters.de/pics/diamant_tutorial.zip
thx für eure hilfe